Installing VMware Horizon on macOS
How to download, install, and configure the client.
Downloading Installing Configuring
If you are having trouble installing or configuring the desktop client on your computer, try using the Web Client instead.
Downloading the Client
1. Navigate to https://view.mst.edu.
2. Click on Install VMware Horizon Client.
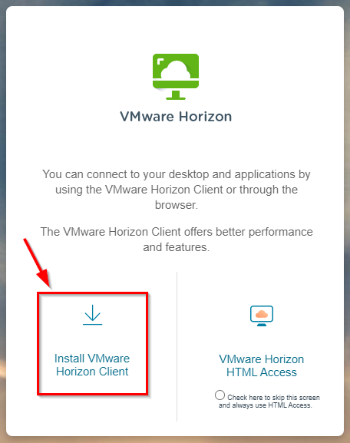
3. You will be taken to the main VMWare Horizon Client download website. Click the Go to Downloads link.

4. Click Download and save the View Horizon Client installer to a convenient location on your local computer.

Installing the Client
1. Locate and double-click the installation file.

2. Click Agree.

3. Click and drag the VMware View Client icon on the leftover to the Applications folder on the right.

Configure the Client
If you are not on campus, you will first need to connect to the campus VPN. For assistance doing so, see the VPN Instructions.
1. Click the Finder icon in the dock.

2. Click Applications.

3. Double-click VMware Horizon Client.
NOTE: If you will be using the VMware View Client on a regular basis, you may want to click and drag the icon to the dock so it stays there for quick access.

4. If a security prompt opens, click Open.

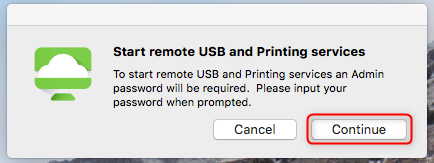
5. If VMware prompts you to enter your password for USB and Print services, click Continue and enter your password.
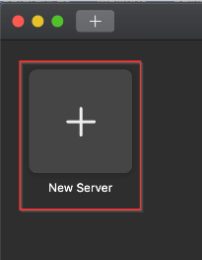
6. Click New Server.
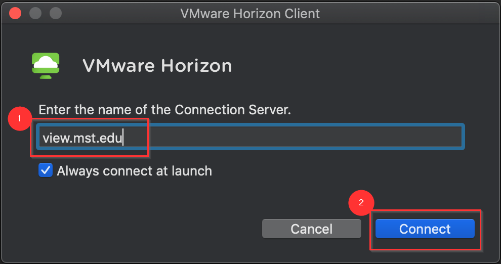
7. Type view.mst.edu and click Connect.
8. Type in your UM System SSO UserID and password, then click Login.
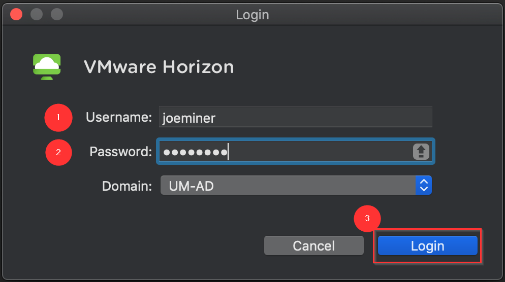
9. Double-click the pool of virtual machines you want to use.
NOTE: Pools available to you are determined by the courses in which you are enrolled, as requested by the instructor.

10. To disconnect from the VDI, click on the cable button at the top left of the VDI window.
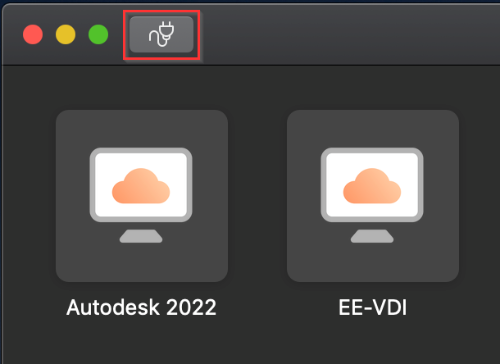
11. Select the Disconnect button to finalize it.

