Security Keys

Security Key Quick Setup Guide (Windows):
Setup Instructions for Windows, Mac, and Linux

Setting up a security key is a simple process, but specific steps may differ depending on your computer's operating system. 

Security Key User Guide

Information and tips about how to use your security key after setting it up.

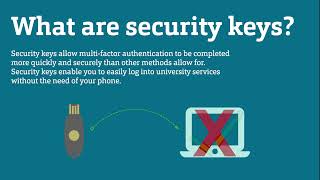
What are Security Keys?

Security keys are a convenient alternative to using your cell phone, office phone, or email to handle the Multi-Factor Authentication (MFA) system currently being used by the university. These easy-to-use keys help get you logged into your computer, provide fast access to websites and applications, and are more secure than other modes of authentication. Security keys help to protect against account takeovers, online attacks, and phishing attempts. The TrustKey T110 security key recommended by the S&T IT Department is FIDO2 Level 1 security certified and uses both touch authentication and a PIN to provide users with enhanced security.

T110 security keys are currently being given to faculty and staff on campus as a gift from the S&T IT department to help strengthen safe computing efforts across campus. These security keys may also be purchased at the campus bookstore for $20.


#securitykeysetup

To point to this anchor, create a link with the target "#securitykeysetup" instead of a URL. Note that this blue block will not be visible on your live site or in previews.

Setting up a Security Key

To set up a security key for MFA use, please see the instructions for your operating system shown below.

  1. Go to https://aka.ms/mfasetup and sign in with the account you wish to set up the trust key with.
  2. Once you log in make sure you are on the “Security info tab” on the left side
  3. Now press “add a new sign in method” in the center of the screen.
  4. From the drop down box select “Security key” then press add, then next.
  5. You may be asked to sign in again.
  6. After the sign-in pick the type of key you have. You are using a USB Device.
  7. Press next and it will tell you to be ready. Press next again and wait for the next pop up. When prompted, touch the gold circle on the key.
  8. Follow the steps to set up a Pin, name the key, and then test the sign in.
  9. After that you have added the Key as an MFA method.
  1. Go to https://aka.ms/mfasetup and sign in with the account you wish to set up the trust key with.
  2. Once you login make sure you are on the “Security info tab” on the left side
  3. Now press “add a new sign in method” in the center of the screen.
  4. From the drop down box select “Security key” then press add, then next.
  5. You may be asked to sign in again.
  6. After the sign-in pick the type of key you have. You are using a USB Device.
  7. Press next and it will tell you to be ready. Press next again and wait for the next pop up. When prompted, touch the gold circle on the key.
  8. Follow the steps to set up a Pin, name the key, and then test the sign in.
  9. After that you have added the Key as a sign in method.
  1. Go to https://mysignins.microsoft.com/security-info and sign in with the account you wish to set up the trust key with.
  2. Once you login make sure you are on the “Security info tab” on the left side
  3. Now press “add a new sign in method” in the center of the screen.
  4. From the drop down box select “Security key” then press add, then next.
  5. You may be asked to sign in again.
  6. After the sign-in pick the type of key you have. You are using a USB Device.
  7. Press next and it will tell you to be ready. Press next again and wait for the next pop up. When prompted, touch the gold circle on the key.
  8. Follow the prompts to set up the key's PIN and name your key. Test signing into a program.
  9. The key is now successfully added as a sign-in method