Simple Syllabus
- About Simple Syllabus
- Activate SS in your course
- Edit the SS Template
- Publish/Submit or Preview your syllabus
- Copy syllabus to another semester or instructor
- SS Dashboard
- Viewing student interaction with the syllabus
About Simple Syllabus
Simple Syllabus (SS) is a centralized and template-driven platform that automatically populates syllabi with foundational accreditation and regulatory information while still giving faculty the autonomy to personalize curriculum content. The technology was designed specifically with the learning management environment in mind, making syllabus viewing and editing feel like a native Canvas experience.
Simple Syllabus integrates with Canvas to make the syllabus creation easy for faculty and easily accessible for students.
Benefits:
- Faculty task-force designed template helps you to communicate readily and easily with your students and ensure you don't miss communicating essential information to your students.
- Copy syllabus content from one semester to another with the click of a button.
- There is no need to download the old version of your syllabus, update it, and upload it back into Canvas. All updates can be made directly in SS.
- Add custom information blocks to your syllabus.
- Easily share your syllabus with a colleague who is teaching the same course.
- No more need to update the "boilerplate" information in your syllabus every semester. We take care of that for you with the syllabus template. If any changes need to be made to this information during the semester, those changes will show up automatically in your syllabus.
- Customized templates can be created for colleges, departments, and programs.
Activate SS in your course
To use Simple Syllabus for the first time, you must activate it in your course navigation menu bar.
- Login to Canvas and access your course
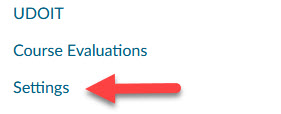
- Scroll down in your course navigation menu and select Settings
- Select the Navigation tab

- This page shows all possible items for your course navigation menu. It is divided into two sections: the top section is active menu items and the bottom is those that are currently not active.
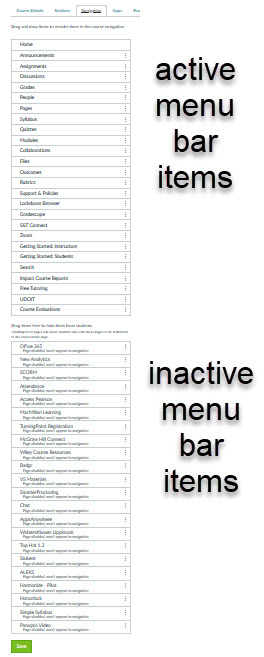
- Find the Simple Syllabus link and drag it to the top section of the menu items. Place it wherever you would like it to appear in your course menu.
- NOTE: It is highly recommended that you deactivate the Canvas Syllabus link if you activate Simple Syllabus.
- In the upper section of menu items find the Canvas Syllabus link and drag it to the lower section to disable it.
- This will prevent confusion for your students since there will be only one selection for syllabus access.
- Scroll to the bottom of the screen and click the green Save button.
Simple Syllabus should now appear in the course navigation menu for you and your students.
Edit the SS Template
Before you Edit: Make sure that the Simple Syllabus link is activated in your Canvas course. If it is not there check the "Activate SS in your course" tab on this page.
You can access the syllabus template via your Canvas course or your SS Dashboard (for information on your dashboard see the "SS Dashboard" tab on this page.
To access SS to edit from your course: Click on the Simple Syllabus link in your course navigation menu. This will take you directly into the syllabus template for that course.
How the template is organized:
Content is divided into blocks or components. Each block has a specific purpose. In some cases, two blocks may have very similar names (Ex: Course Information & Course Information (hidden). This generally means that the information in the first block is pulled in from JoeSS or Canvas, and cannot be edited by the instructor, but will be automatically updated if the source system changes.
Each block has a section of Help text to guide you about the content expected in that section.
Blocks with a pale green header are for information or instructions only and will not be viewable by the student.
Block headers:
- You will see switches for Visible and Public
- Hover over the ? by the switch for an explanation about the switch
- If the Visible switch is grayed out, this is a required block
Information in blocks. If a block is optional and you do not enter any information, that block will not be published on the student version of the syllabus.
Editing content:
In our template you will see two types of editable content:
- A rich text editor. Add or edit any content in these blocks.
- Content can be formatted
- Links can be added
- Images or multi-media can be added
- Sections with a pencil icon. To add or edit information in these sections click on the pencil icon.
- Content in these sections can be deleted by clicking on the pencil and then the trash can icon in the popup.
- NOTE: If the block is required at least one item must remain in these types of blocks.
Cutting and pasting:
While you cannot import your current syllabus, you can copy content from another document and paste it into a Simple Syllabus block.
Updating your Syllabus:
Updating your syllabus during the semester is easy. Just go into Simple Syllabus, make the changes, and those changes will be reflected in the student view of the syllabus.
Previewing your Syllabus or what does the student see:
This is different than most content in Canvas. You cannot see the syllabus in Canvas student view. However, at the bottom of the Simple Syllabus screen, there is a Preview button. This allows you to see the syllabus as a student would.
New sections:
While the task force tried to cover most situations, there may be something in your syllabus that doesn't fit any of these categories. You can add a new section to the syllabus. The +Add button will open a new syllabus block for your information. This block is added to the end of the syllabus, but you can change the order of that block or any other block in your syllabus, using the Reorder button
Publish/Submit or Preview your syllabus
After edits to your syllabus it it is easy to publish.
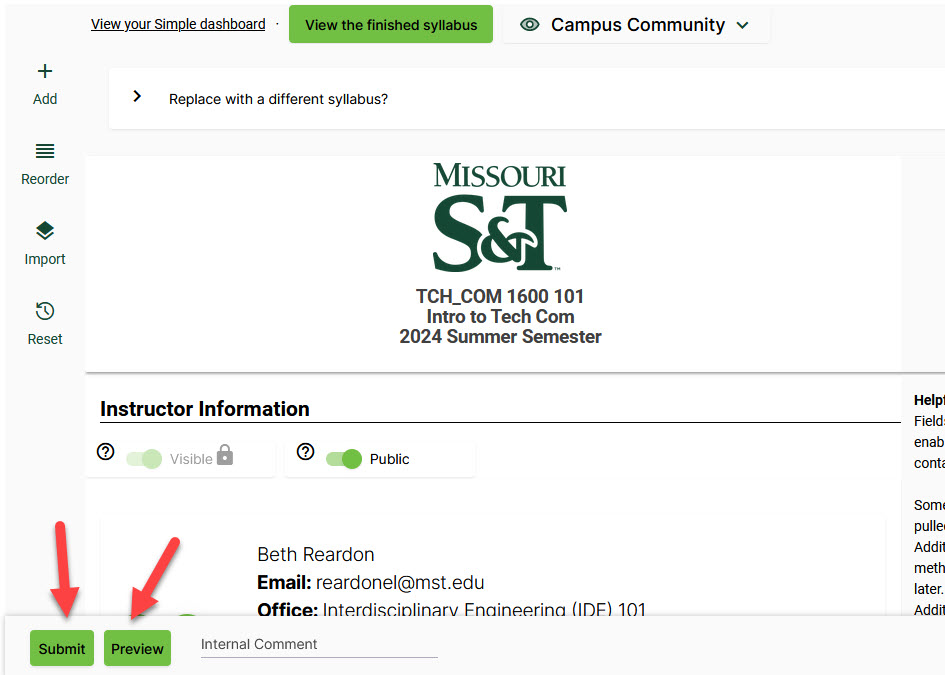
At the bottom of the screen there are two buttons - Submit and Preview
Preview allows you, the instructor, to see the syllabus as your students would
Submit allows you to publish your syllabus in its current state. You can update and re-submit your syllabus at any point in the semester.
NOTE: The syllabus cannot be submitted and published until all the required fields have been filled in. However, your work will be automatically saved as you work.
To exit from the syllabus page without submitting, click on any other course link.
Copy syllabus to another semester or instructor
If you are teaching a course with the same name as the previous semester, Simple Syllabus will populate information to the current semester from that course. This information can be edited.
This template can be reset to the default master template or the defined template for your college, department, or program.
You can also choose to import from a previous or current semester.
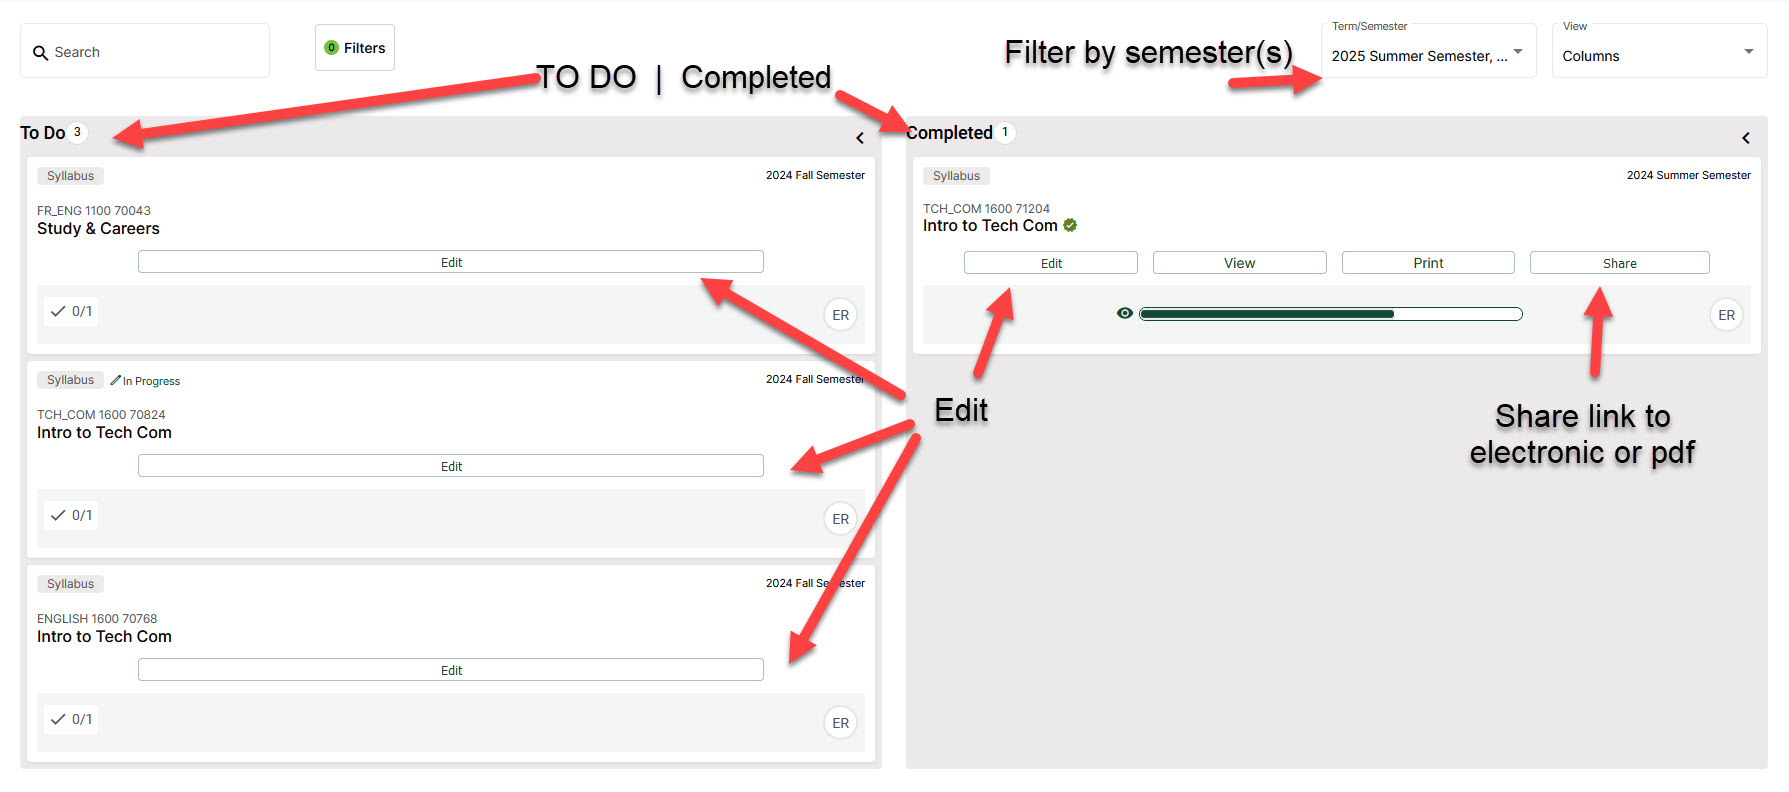
SS Dashboard
If you would like to see all your syllabi and their status visit your Simple Syllabus dashboard https://mst.simplesyllabus.com/en-US/dashboard. This allows you to filter your view and see the status of your progress and past syllabi.
Viewing student interaction with the syllabus
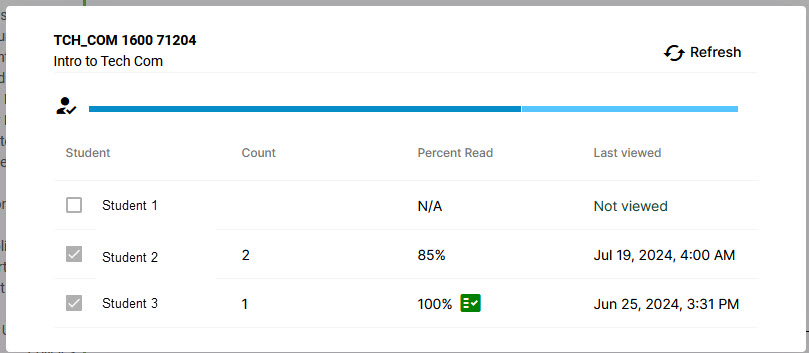
At any point in the semester (after your syllabus is published) you can see how your students have interacted with the syllabus.
On the Simple Syllabus link in your Canvas course, click on the person icon.
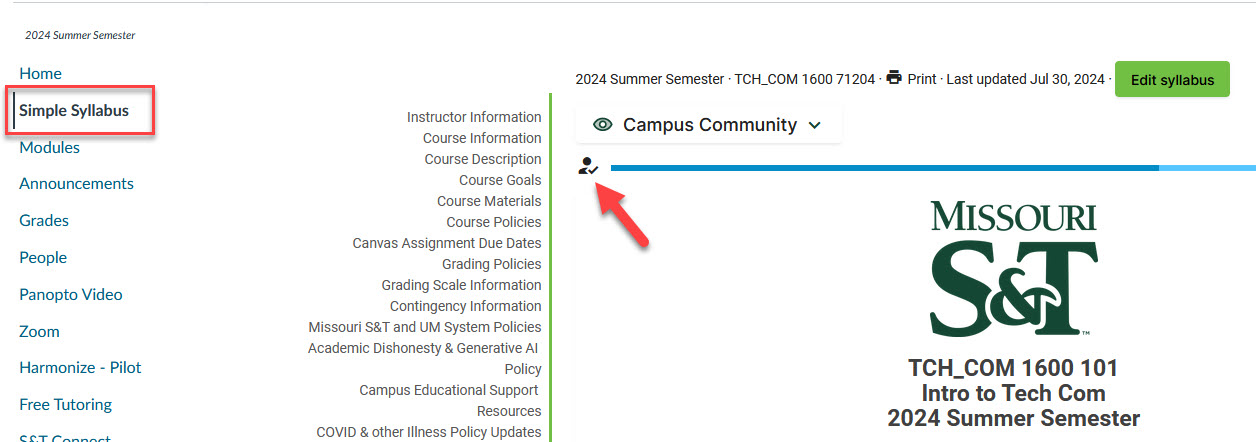
This will bring up a list of the students currently enrolled in your course and show how they have interacted with the syllabus.
You can see how many times the student has viewed the syllabus and what percentage of the syllabus they have viewed.