VDI Thin Client
The VDI Thin Client is a way for you to remotely access S&T computers when you're away from campus. In addition to letting you access your files when away, you can also make use of the suite of apps provided through Apps Anywhere. While using the Thin Client, make sure to save all your work to your S: Drive, as anything stored on the C: Drive will be wiped when the client shuts down. You can also use cloud storage services through webpages, such as OneDrive or Google Drive.
Connecting to VDI Thin Client
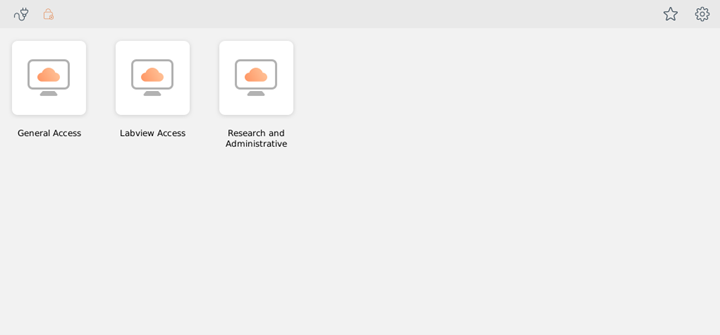
To get connected to the Thin Client VDI, open VMWare Horizon and sign in. Then, click "Research and Administration" from the displayed list of VDI pools. You can find more info about how to connect on the S&T IT VDI page.
Note: If you disconnect from the client without logging out, the virtual machine will be retained for one hour before it is deleted.
VDI Thin Client Considerations
Your VDI session is running on a remote server. While USB functionality is present, some functions may limited. For example:
- Web cam resolution is reduced
- Hardware security keys do not work
- If you have any other issues, contact the IT Help Desk
Printers can be added through “Help Me Print,” but will need to be added each time you log in.
Software Restrictions
Because of limitations when working with a remote connection, some software programs cannot be accessed with a Thin Client. Others may be able to be launched, but will not perform well. Below is a list of incompatible software:
| Software | Can License in VDI For Localized Thin Clients |
|---|---|
| AArhus Workbench | No |
| Autodesk - Administrative | No |
| C-plot | No |
| ChronoSync | No |
| Clang | No |
| Crystal Maker X | No |
| CVS | No |
| Design Expert | No |
| Flow3D | No |
| Foxit PDF Editor | No |
| Hampson-Russel CGG | No |
| HCS7 (McTrans) | No |
| LabView Full Development | No |
| LS-DYNA | No |
| Magmasoft | No |
| Mathematica Individual | No |
| MathType | No |
| IC Nanometer Design | No |
| MineSight | No |
| MOVE | No |
| OptimumKinematics | No |
| OptimumDynamics | No |
| OptimumTire2 | No |
| Origin Pro | No |
| PLECS | No |
| Rocscience | No |
| R-Studio | No |
| Solidworks Professional | No |
| SPSS | No |
| SPSS - Decision Tree | No |
| Star-CCM | No |
| Stella-ISEE | No |
| Thermal Desktop | No |
| VASP | No |
| Visio | No |
| Visual Lighting | No |
Despite these incompatibilities, general access and research pool Thin Clients are equipped with Nvidia graphics cards and are able to run graphically intensive programs with equal or better performance than the Optiplex series computers commonly found on campus.
Helpful Links
Below are some resources that you might find helpful when setting up or using the Thin Client VDI. For more resources, view our QR code link page. If you need further assistance, submit a ticket to the IT Help Desk.
Cloud Storage
Learn about the types of cloud storage recommended by the UMSystem.
Click here
Other Helpful Information
Setting up Multiple Monitors
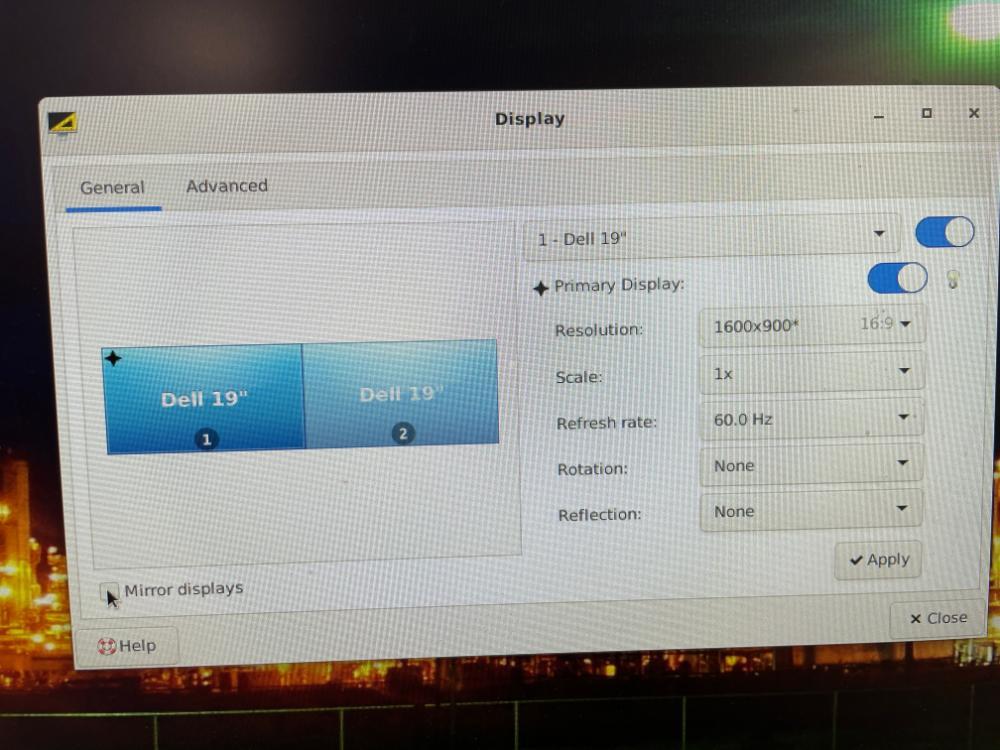
To set up multiple monitors, first hit Windows+P before connecting to Windows to bring up the displays dialog box. Then click Advanced in either the lower left corner or in a separate tab.
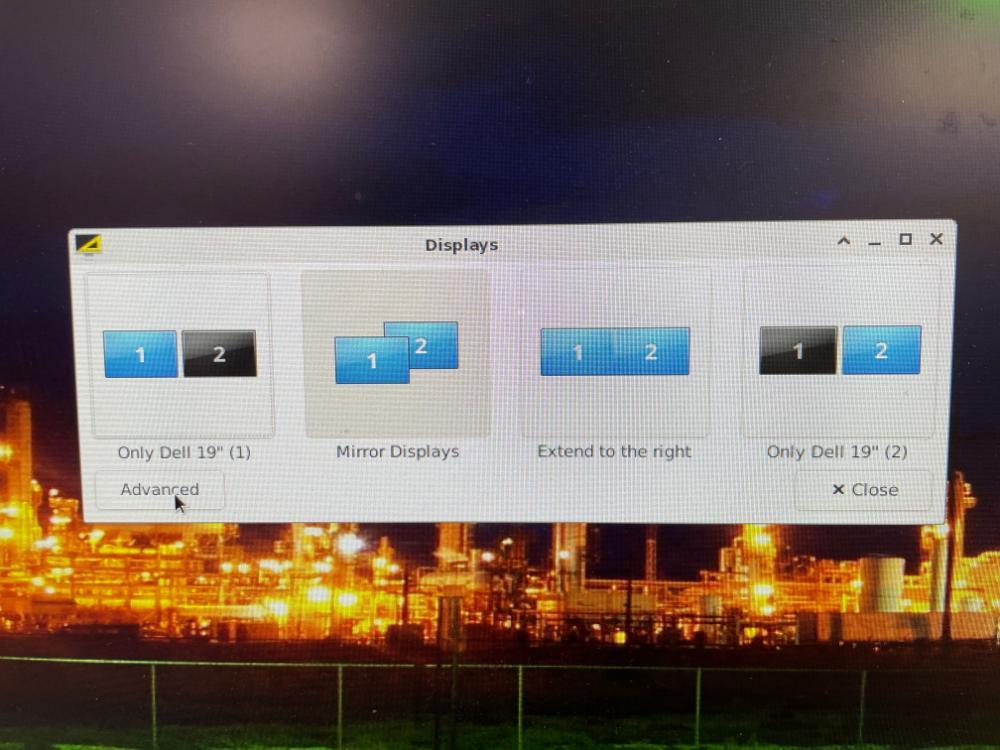
On the arrangement screen, orient the displays to your liking, ensure that Mirror Displays is turned off, and then click Apply.
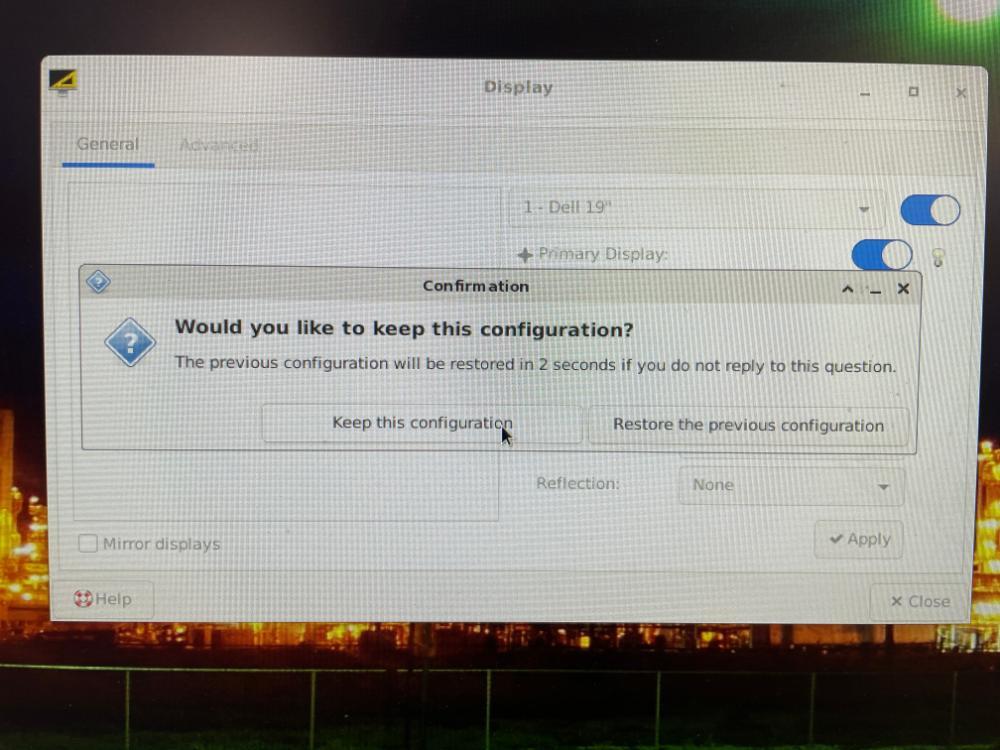
When the confirmation dialogue box appears, click Keep This Configuration.
When you sign into the Horizon View Client, you should be able to click View->Full Screen - All Monitors, and open the window on both screens.

Your Thin Client should now be able to make use of multiple displays.